本文将首先介绍 OpenTelemetry 基本知识,然后介绍如何部署 Quickwit 以对接 OpenTelemetry 实现可观测性数据存储。
OpenTelemetry 介绍
OpenTelemetry 将可观测性分成了 Log、Trace、Metrics 三个领域,如下图所示:

在我们通常的认知中,Log 是由 Filebeat、Flume、Fluentbit 等工具从服务器、容器平台等源端采集,可经过 Logstash 等转换、处理、聚合,然后送入 Elasticsearch,经典的 ELKB 方案。
Trace 是由 Skywalking、Zipkin 等 SDK 框架结合代码打埋点,通过 Jeager( UI + Collector)等工具进行收集和查询。
Metrics 则是需要中间件、程序开放 /metrics 端点,由 Prometheus 进行收集,由 Grafana 进行展示。
这三者共同构成了可观测性指标。在通常情况下,三者是分别由不同类型的工具进行采集、存储、展示的,而 OpenTelemetry 则将三者合并到一起,提供了统一的 OTLP 协议,使用统一的 Otel-Collector 组件进行收集。
Otel-Collector 部署
前文 部署OpenTelemetry Collector 已经介绍了如何部署 Otel-Collector,并且将 trace 数据存入了 Elasticsearch。此处不再赘述。
Opentelemetry-javaagent 配置
本文以 Java 为例介绍如何在 JAVA_OPTS 中配置 Opentelemetry-javaagent,参考如下:
-javaagent:/path/to/your/opentelemetry-javaagent.jar
-Dotel.service.name=<service_name> -Dotel.propagators=b3
-Dotel.instrumentation.common.default-enabled=true
-Dotel.instrumentation.common.db-statement-sanitizer.enabled=false
-Dotel.instrumentation.redisson.enabled=false
-Dotel.metrics.exporter=prometheus
-Dotel.traces.exporter=otlp
-Dotel.logs.exporter=otlp,logging
-Dotel.exporter.otlp.endpoint=http://otel-collector:4317
-Dotel.exporter.prometheus.port=9464
-Dotel.exporter.prometheus.host=0.0.0.0
以上配置中,开启了 otel 的三大可观测性指标:otel.traces、otel.logs、otel.metrics。其中 metrics 开在了本地的 9464 端口,并指定由 prometheus 接收;logs 配置了两个导出器,一个将通过 otlp 协议送到 otel-collector,另一个打印到控制台;而 traces 和之前保持不变。最后指定导出器地址otel.exporter.otlp.endpoint为:http://otel-collector:4317。
go-zero 配置
在前文 go-zero启动链路跟踪功能 中,traces 通过 jaeger 方式送到 jaeger-collector、或者兼容 jaeger 协议的 otel-collector:14278 端口。本文将使用 otlp 协议送到 otel-collector:4317 端口,配置如下:
Telemetry:
  Name: fiops-automation
  Endpoint: otel-collector:4317
  Sampler: 1.0
  Batcher: otlpgrpc
使用 Quickwit 存储、查询数据
Quickwit 介绍
Quickwit 是一个用于日志管理和分析的开源、云原生、分布式搜索引擎。Quickwit 用 Rust 编写,从头开始设计,可在大型数据集上提供成本效益和高可扩展性,是 Elasticsearch 的现代且可靠的替代方案。
本文将 OpenTelemetry 收集到的数据从 Elasticsearch 替换为 Quickwit。
Quickwit 部署
Quickwit 支持单节点部署和集群部署,本文仅做功能测试,使用单节点部署,生产上强烈建议使用集群方式部署,具体部署方案参见 Deployment modes
在 Kubernetes 上以 deployment 方式部署:
kind: Deployment
apiVersion: apps/v1
metadata:
  name: quickwit
  namespace: default
  labels:
    app: quickwit
spec:
  replicas: 1
  selector:
    matchLabels:
      app: quickwit
  template:
    metadata:
      creationTimestamp: null
      labels:
        app: quickwit
      annotations:
        kubesphere.io/collectSavedLog: 'true'
        kubesphere.io/restartedAt: '2024-09-19T10:01:07.865Z'
    spec:
      volumes:
        - name: host-time
          hostPath:
            path: /etc/localtime
            type: ''
        - name: timezone
          hostPath:
            path: /etc/timezone
            type: ''
        - name: config
          configMap:
            name: quickwit-config
            defaultMode: 420
        - name: qwdata
          persistentVolumeClaim:
            claimName: qwdata
      containers:
        - name: quickwit-container
          image: 'quickwit/quickwit:v0.8.1'
          args:
            - run
          ports:
            - name: rest
              containerPort: 7280
              protocol: TCP
            - name: grpc
              containerPort: 7281
              protocol: TCP
            - name: discovery
              containerPort: 7282
              protocol: UDP
          env:
            - name: QW_CONFIG
              value: /quickwit/quickwit.yaml
            - name: QW_DATA_DIR
              value: /opt/qwdata
          resources:
            limits:
              cpu: '2'
              memory: 4000Mi
            requests:
              cpu: 100m
              memory: 100Mi
          volumeMounts:
            - name: timezone
              readOnly: true
              mountPath: /etc/timezone
            - name: host-time
              readOnly: true
              mountPath: /etc/localtime
            - name: config
              mountPath: /quickwit/quickwit.yaml
              subPath: quickwit.yaml
            - name: config
              mountPath: /quickwit/trace-index.yaml
              subPath: trace-index.yaml
            - name: config
              mountPath: /quickwit/log-index.yaml
              subPath: log-index.yaml
            - name: qwdata
              mountPath: /opt/qwdata
          terminationMessagePath: /dev/termination-log
          terminationMessagePolicy: File
          imagePullPolicy: IfNotPresent
      restartPolicy: Always
      terminationGracePeriodSeconds: 30
      dnsPolicy: ClusterFirst
      serviceAccountName: default
      serviceAccount: default
      securityContext: {}
      schedulerName: default-scheduler
  strategy:
    type: RollingUpdate
    rollingUpdate:
      maxUnavailable: 25%
      maxSurge: 25%
  revisionHistoryLimit: 10
  progressDeadlineSeconds: 600
deployment 中用到了三个配置文件,一个是 quickwit 的主配置文件 quickwit.yaml,另外两个是用于新建索引的索引配置文件 trace-index.yaml 和 log-index.yaml。
主配置文件如下:
data_dir: /opt/qwdata
default_index_root_uri: s3://quickwit/quickwit-indexes
gossip_listen_port: 7282
listen_address: 0.0.0.0
storage:
  s3:
    flavor: minio
    access_key_id: tEbN3FvjQrH7JGCR
    endpoint: http://minio:9000
    region: beijing
    secret_access_key: W11u92GPDpyvNxtuLXbkrlq6QGmo9n7F
version: 0.8
强烈建议将 quickwit 的数据存储设置为 S3,并在主配置文件中设置 S3 的地址和相关信息。
创建索引
现在,创建两个新的索引分别用于存放 traces 和 logs。
新建索引 otel-traces-v0_8:
version: 0.8

index_id: otel-traces-v0_8
retention:
  period: 7 days
  schedule: daily
doc_mapping:
  field_mappings:
    - name: trace_id
      type: bytes
      fast: true
      indexed: true
      input_format: hex
      output_format: hex
      stored: true
……
tag_fields: []
store_source: false
index_field_presence: false
timestamp_field: span_start_timestamp_nanos
mode: strict
max_num_partitions: 200
tokenizers: []
进入 quickwit pod,执行命令:
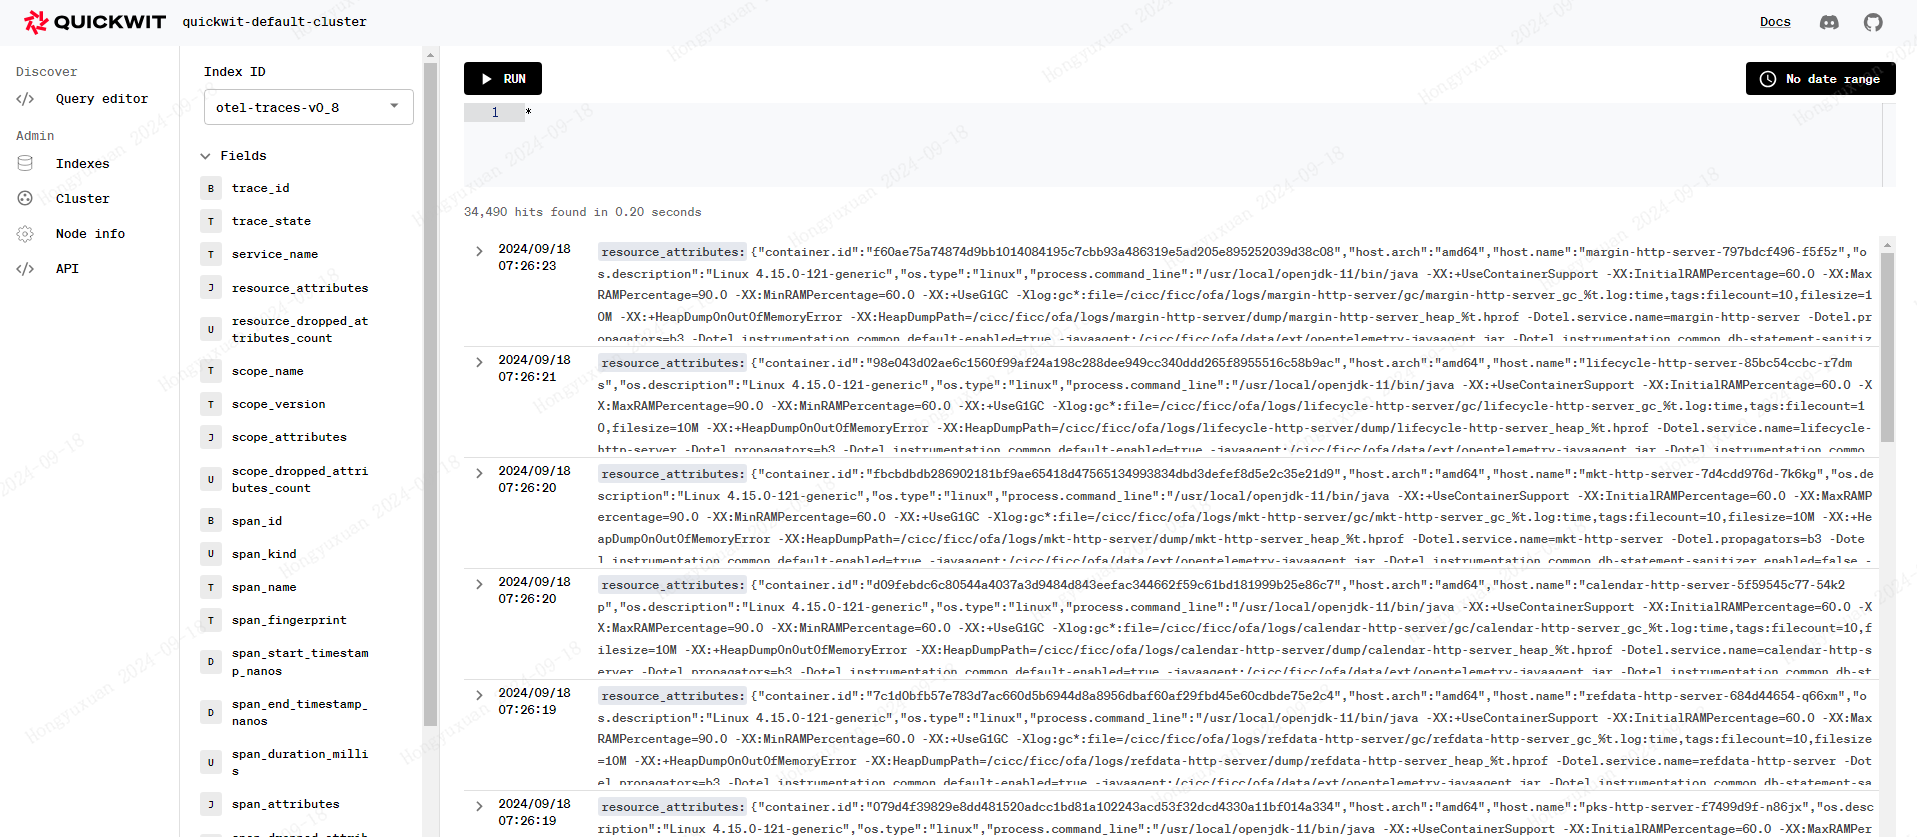
./quickwit index create --index-config trace-index.yaml另外一个索引同理。现在打开 UI 页面查看 quickwit 索引:

搜索数据:

更改 Otel 存储为 Quickwit
修改 otel-colletor 的配置文件,将 exporter 从 jaeger-collector 改为 quickwit,配置文件相见 otel-collector.yaml


